Worldpay B2B Paymetric Adapter
Prerequisite Configuration Steps
Data Needed to Configure SAP Digital Payments Add-On
Configure Worldpay B2B Paymetric Adapter
Supported Payment Functions
-
Card Registration (supports eCheck and Credit Card payment methods)
-
Pre-Authorization during Registration supported for Credit Card payment methods
-
-
Authorization (supports 3DS using Worldpay 3DS Flex)
-
Pre-Authorization
-
Authorization Cancellation (void)
-
Settlement (capture with authorization)
-
Settlement (capture) with Level 2 / Level 3 Data
-
Refund
-
Blind Credit
Prerequisite Configuration Steps
All services must first be enabled by Paymetric internally in the Merchant Profile (a.k.a wizard) so they display under Settings. The following prerequisite configurations must be done in this order before you can configure the SAP Digital Payments Add-On.
-
If implementing XiSecure token format: Create and onboard XiSecure Client if you do not currently have one.
-
Set up the Token Exchange Service for TMS:
-
Create the Security Token Service first.
-
Then, create a Security Token Service for each token type you are implementing. For existing XiSecure customers, you will select the existing Client/DSP when creating the Profile. For Paymetric XiPay tokens, use the values/file obtained above.
-
Process onboarding request for TES.
-
-
Intercept eCommerce: Security Token Service.
-
For existing customers, If you have existing integrations that do not go through TMS, you should create a separate Merchant in Merchant Portal for DPAO onboarding.
-
Otherwise, any existing integrations must be updated to integrate to TMS. For more information, refer to the Intercept eCommerce TMS Integration document.
-
-
If implementing 3DS Flex for Digital Payments Add-On: Get the 3DS configuration fields from the 3DS Flex onboarding team.
-
Continue to the following procedure.
Data Needed to Configure SAP Digital Payments Add-On
You must have all the data listed below to configure SAP Digital Payments Add-On.
-
Paymetric XiPay Merchant Account Information – Establish accounts and obtain the following values:
-
Merchant ID (XiPay Routing MID)
-
Merchant Username (XiPay WSA username)
-
Merchant Password (XiPay WSA password)
-
-
Tokens/TMS Setup Information – Merchant Identifier or Shared Key from the TES Profile
-
SAP Digital Payments Add-On – Set up/onboard Digital Payments Add-On in SAP. After onboarding, you will use the following values in Merchant Portal:
-
Tenant ID
-
Tenant Subdomain
-
For more information on the SAP Digital Payments Add-On account setup, refer to the SAP documentation: https://help.sap.com/docs/DIGITALPAYMENTS/a5c364402f8d4c0b99f6a4c7de385a56/1dedbb58ac1747dea8d768d971c1e484.html
Configure Worldpay B2B Paymetric Adapter
-
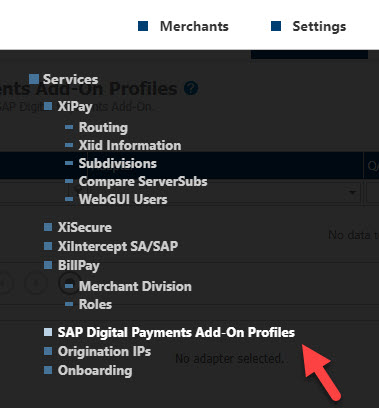
Select SAP Digital Payments Add-On Profiles under the Settings menu for the Merchant. You can also access this from the Merchant Settings dashboard.
-
To add a profile, click add. To edit an existing DPAO profile, select the profile and click edit.

-
To configure a profile:
-
Enter a Name.
-
Select B2B Adapter (SAP DPAO) from the Adapter drop-down list.

-
-
Enter the following Profile Configurations. For each profile configuration, enter the QA value and Production value:
For all Digital Payments Add-On profiles that are configured for a given Merchant, the following fields should be configured with the same values: Tenant Id, TMS Profile Name, Tenant Subdomain, TMS Merchant Identifier, and TMS Shared Key.
Merchant Account
Merchant Account ID (XiPay Routing MID)
Username and Password
User name and password (XiPay WSA username and password)
Tenant Id
SAP Tenant ID. You must use the same Tenant ID if you are creating multiple profiles.
For more information, refer to the SAP Digital Payments Add-On Account Setup documentation: https://help.sap.com/docs/DIGITALPAYMENTS/a5c364402f8d4c0b99f6a4c7de385a56/1dedbb58ac1747dea8d768d971c1e484.html
TMS Profile Name
Name of the Token Exchange Service Profile. This must be enabled in the Security Token Service.
You must use the same TMS Profile Name if you are creating multiple profiles.
Tenant Plan
The type of SAP tenant. Leave default values.
Tenant Subdomain
The name of the SAP Tenant Subdomain used to identify the tenant. You must use the same Tenant Subdomain if you are creating multiple profiles.
For more information, refer to the SAP Digital Payments Add-On Account Setup documentation: https://help.sap.com/docs/DIGITALPAYMENTS/a5c364402f8d4c0b99f6a4c7de385a56/1dedbb58ac1747dea8d768d971c1e484.html
TMS Merchant Identifier
Enter (or copy/paste) the Merchant Identifier from the Security Token Service.
You must use the same TMS Merchant Identifier if you are creating multiple profiles.
TMS Shared Key
Enter (or copy/paste) the Shared Key from the Security Token Service.
You must use the same TMS Shared Key if you are creating multiple profiles.
Supported Payment Types
Configure the supported payment types for a DPAO profile. Values include:
-
American Express
-
Diners Club
-
Discover
-
JCB
-
MasterCard
-
UnionPay
-
Visa
-
eCheck
IMPORTANT: For the Merchant to use the configured supported payment types for a given profile, the Merchant must configure the following on SAP's PSP Determination page:-
Card Registration Context field with the applicable Merchant Account of the adapter profile.
If the Merchant does not provide the Card Registration Context, the registration page will display a default list of payment types:
-
American Express
-
Diners Club
-
Discover
-
JCB
-
MasterCard
-
UnionPay
-
Visa
Support Pre-Authorization during Registration
Enables support for Pre-Authorization during Registration for Credit Card payment methods. Default value is Disabled.
Support 3DS
Enables support for 3DS Flex. When enabled, enter the following configuration fields for Production and QA:
-
3DS Worldpay Merchant Code
-
3DS Worldpay Username
-
3DS Worldpay Password
-
3DS Worldpay External Acquirer Reference
-
3DS Org Unit ID
-
3DS API Identifier
-
3DS API Key
-
-
Click save.